
Most "how to read sheet music" guides open with a picture of the staff and a rhyme about good boys. Then they leave you alone with it. You learn that the bottom line is E and the spaces spell FACE. Then you sit at a keyboard with a real piece of music and nothing happens, because knowing what a note is called and playing it in time are two different skills.
This post is the route we'd give a friend who has never read a note. It takes a week, about fifteen minutes a day, and every step happens on the keys rather than on paper.
Reading music is a skill of the hands as much as the eyes. Learn it at the keyboard, not about the keyboard.
Why the staff comes last
The order matters more than any trick. Here's the one we use, and why.
- The keys first. If you can't find C without counting from the left end, every note on the page becomes a hunt. The keyboard has a pattern that makes this instant, and it takes three minutes to learn.
- Then your hands. Which finger goes where decides whether a five-note tune feels easy or feels like typing with your elbows.
- Then the beat. You can learn rhythm on a single key, with no reading at all. Doing it before the staff means that when notes arrive, you only have one new thing to think about.
- Then the staff. By now the staff is just a way of writing down things your hands already know.
Most beginners do this backwards: they learn the note names, then try to bolt timing on later. That's how you end up playing every note correctly and the tune is still unrecognisable.
Day 1: find your way around the keys
The black keys come in groups of two and three. That's the whole map. The white key just left of any group of two is C, every time, all the way up the keyboard. D sits between the two black keys, E just after them. F sits just left of the three, then G, A and B.
Find three different Cs without looking for help, and you'll never lose C again. The one nearest the middle is middle C, home for both hands. On paper it gets its own little line below the staff.
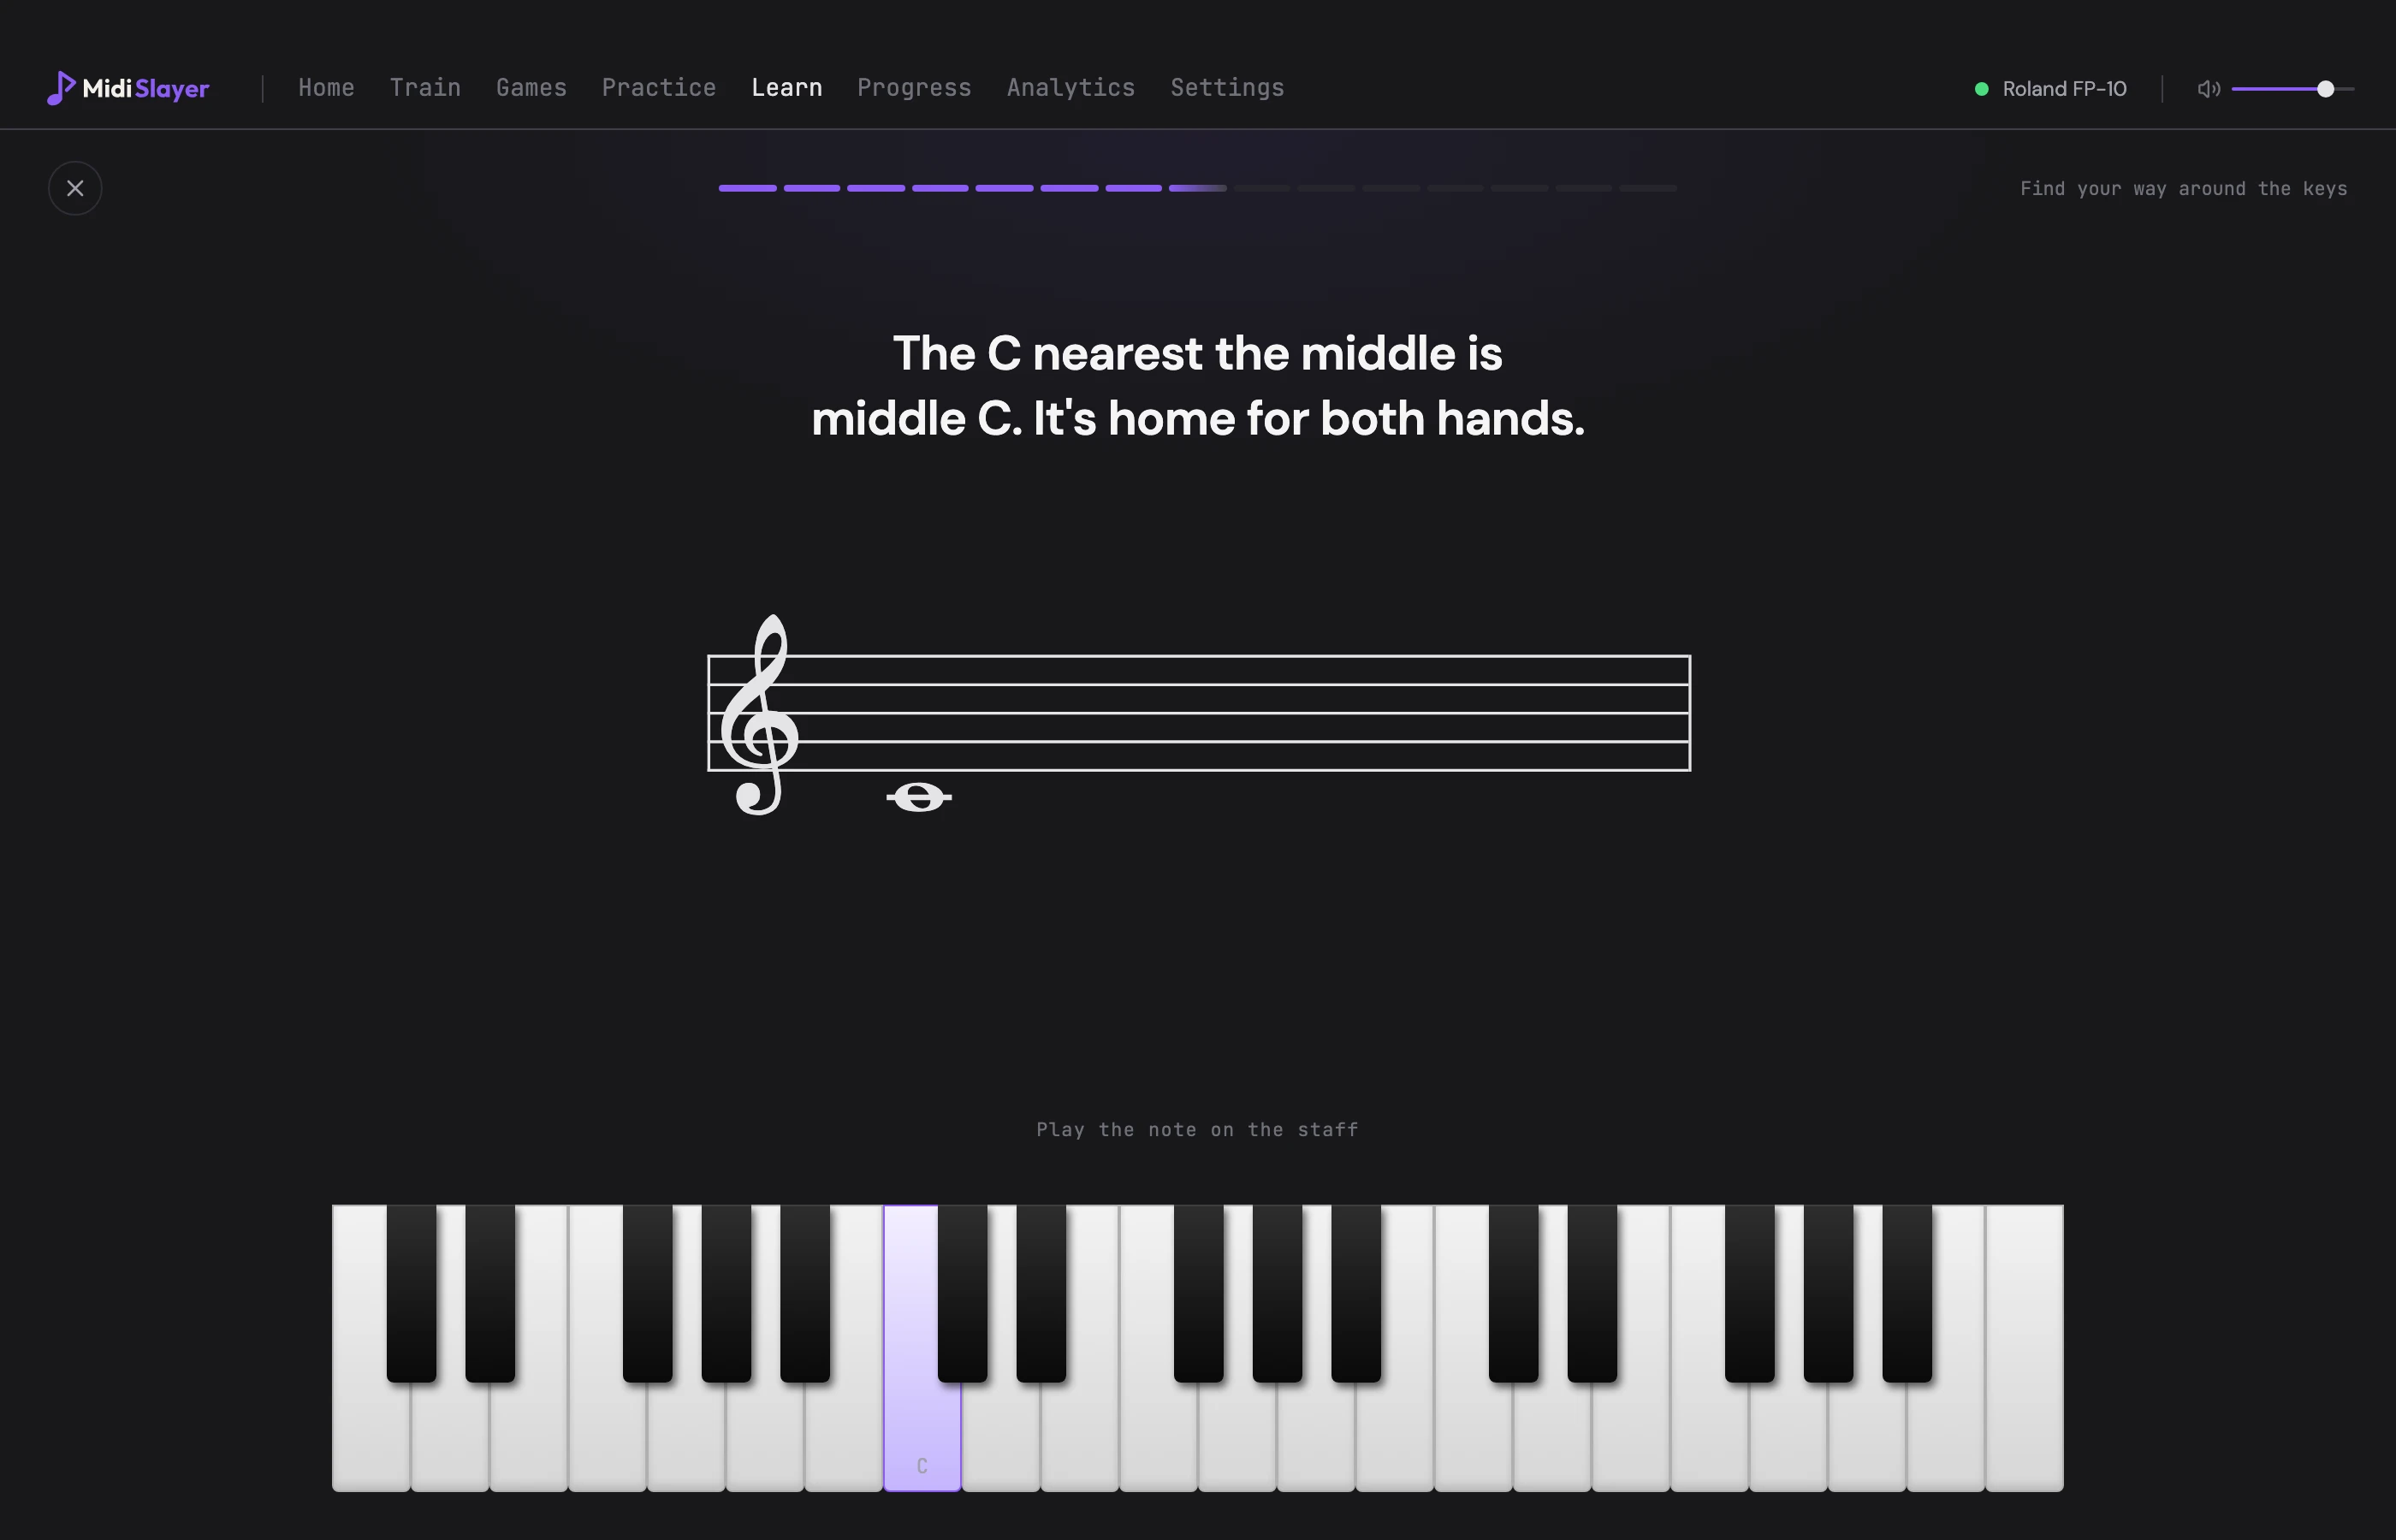
Then do your second lesson the same day, on hands. Number your fingers, thumb 1 to little finger 5. Put your right thumb on middle C, one finger per key up to G, and you're in C position: five keys, five fingers, and your hand never moves. Learn the thumb-under trick and you can play the whole C major scale.
Days 2 and 3: rhythm, on one key
Music has a pulse, like walking. Before you read a single pitch, learn to play with a click.
- Quarter note: filled in, with a stem. One beat.
- Half note: hollow, with a stem. Two beats. Press once and hold.
- Whole note: hollow, no stem. Four beats, a whole bar.
- Rests: the same lengths, in silence. You keep counting through them.
All of this works on any one key. On day 3 add three beats in a bar (waltz time), the dot that adds half a note's length again, and the tie that joins two notes into one press.
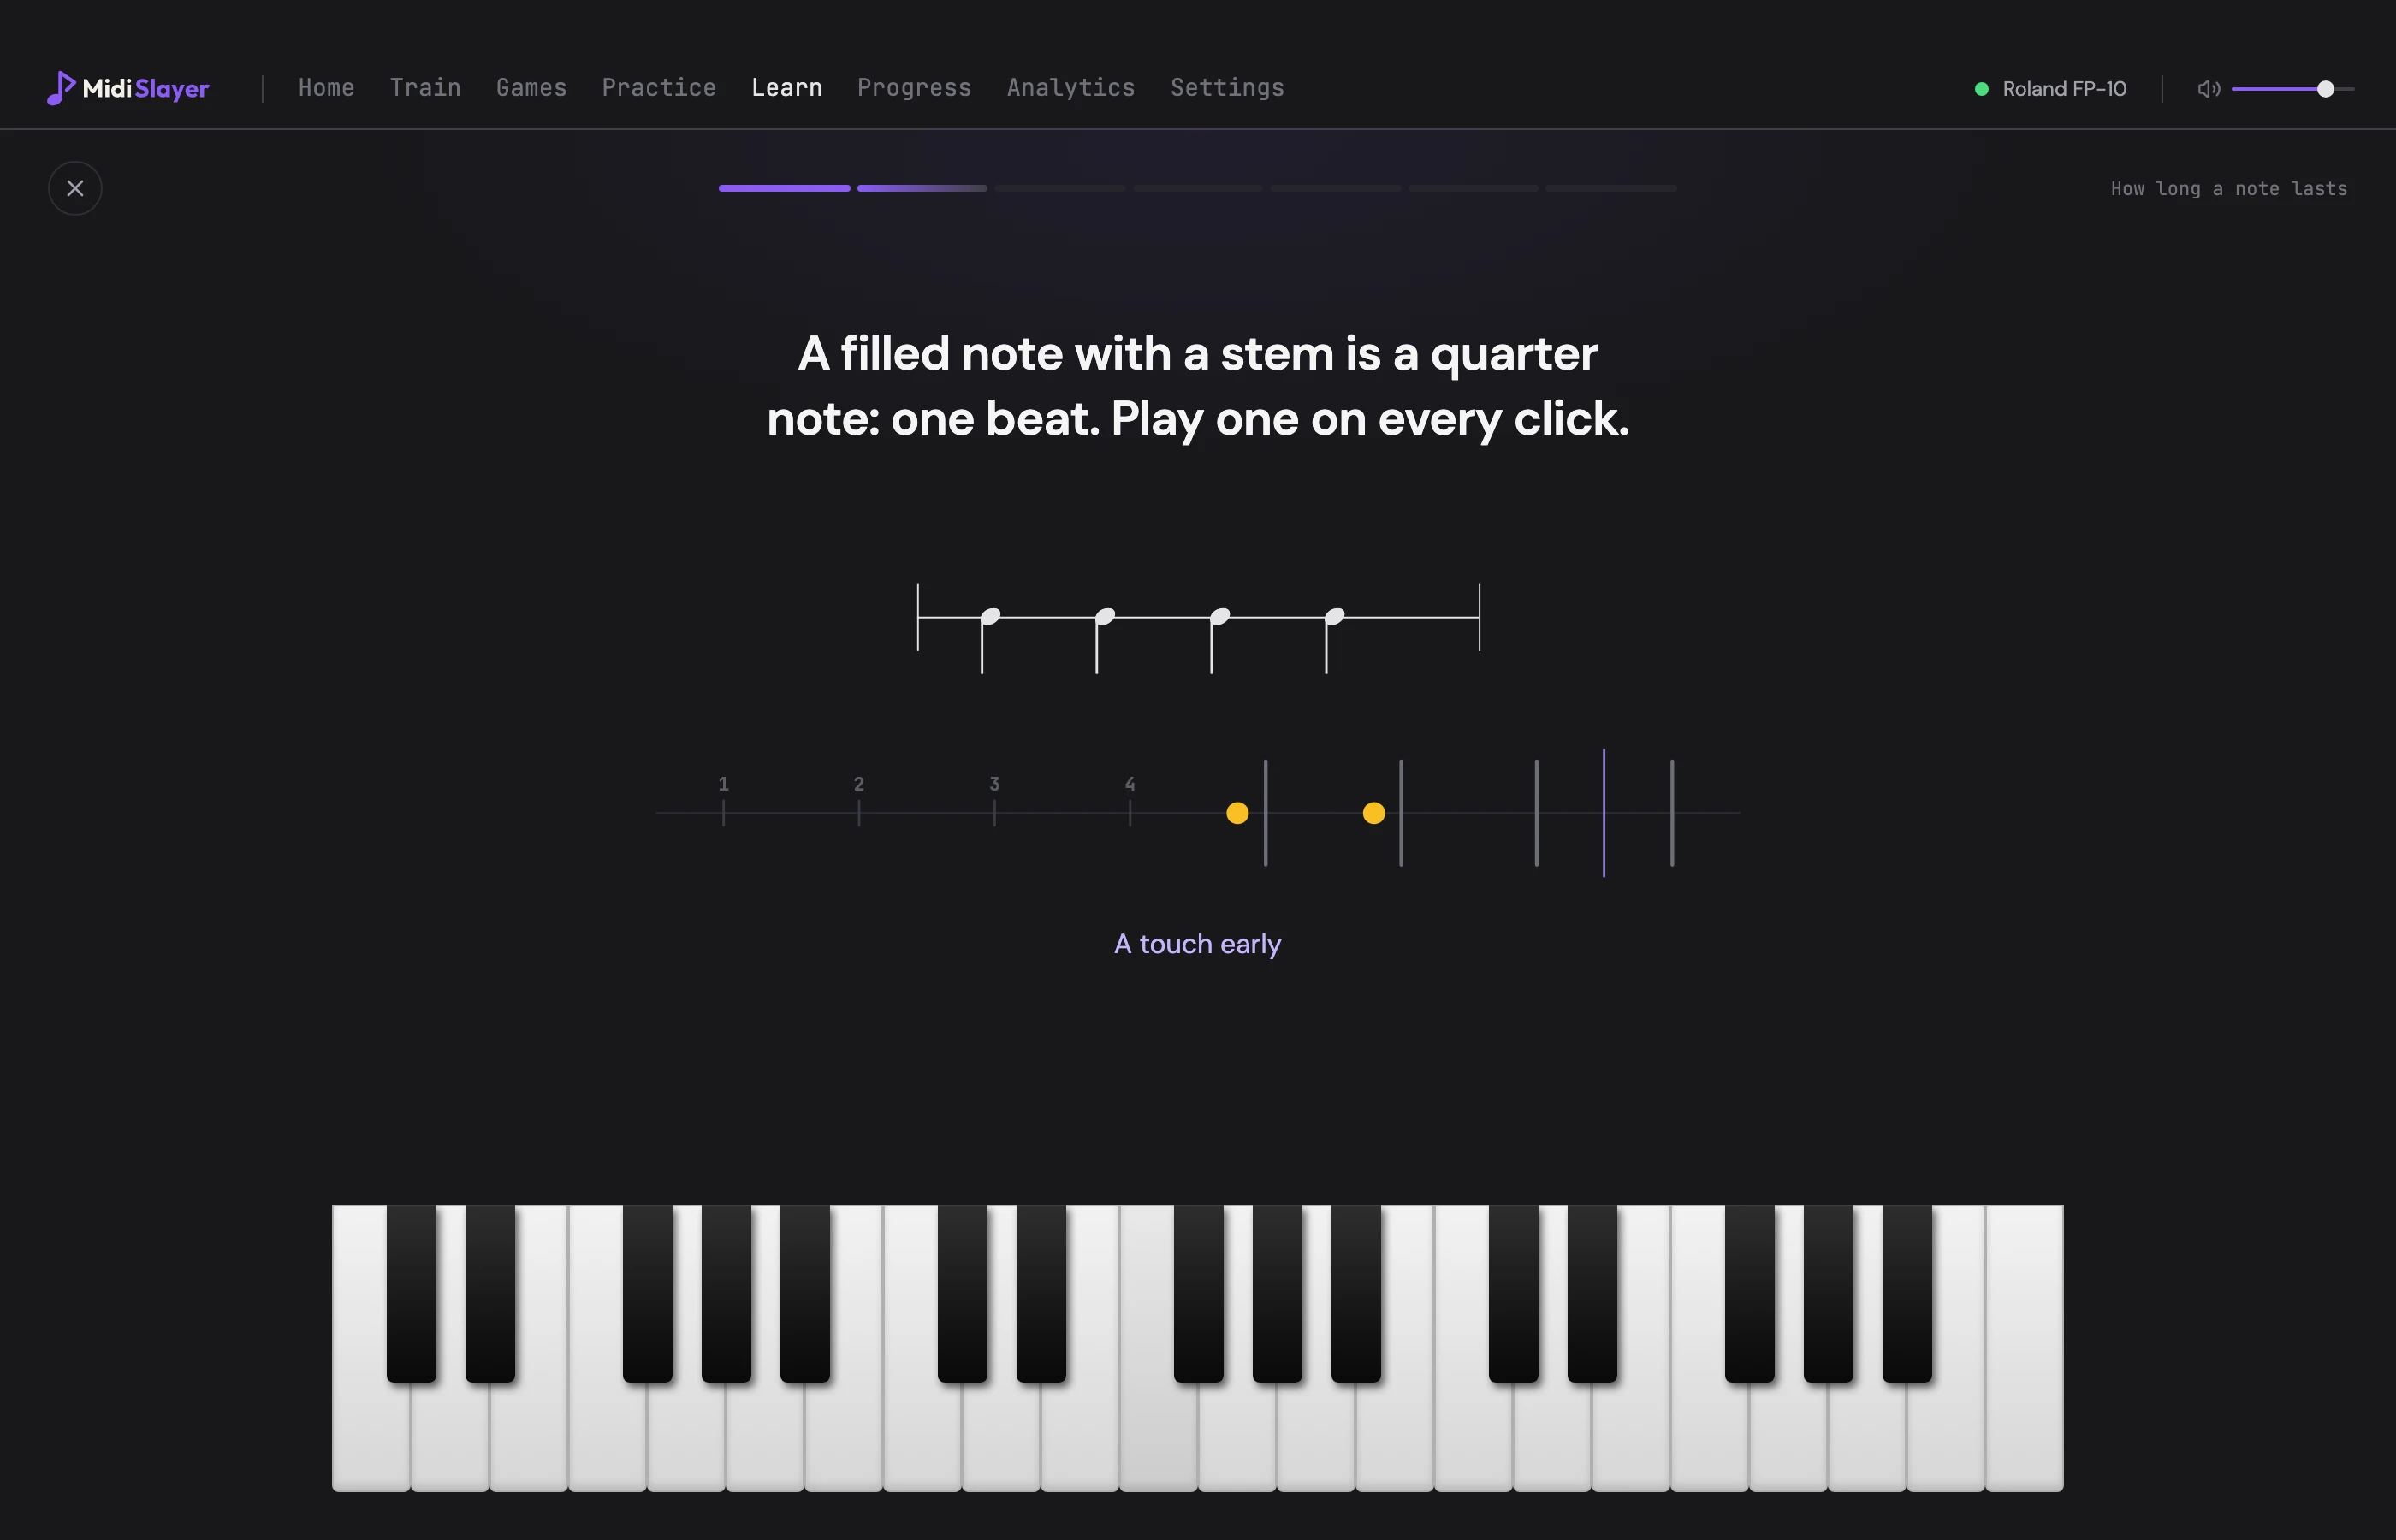
One thing to know about playing along with a computer: there's always a small delay between your key and what the computer hears. It varies with your keyboard, your cable and your machine. That's why the first rhythm lesson asks you to tap along to the click a few times. It measures your setup's delay so that "early" and "late" are judged fairly from then on.
Days 4 to 6: the staff, then both staves
Now the staff, and it goes quickly, because you already know where every note lives.
The treble clef is for the higher notes, usually the right hand. Middle C hangs below the staff. Each step up the keyboard is one step up the page: line, space, line, space. Skip a key and you skip from line to line. The lines spell E G B D F, and the spaces spell F A C E. The rhymes help for about a week, then you stop needing them.
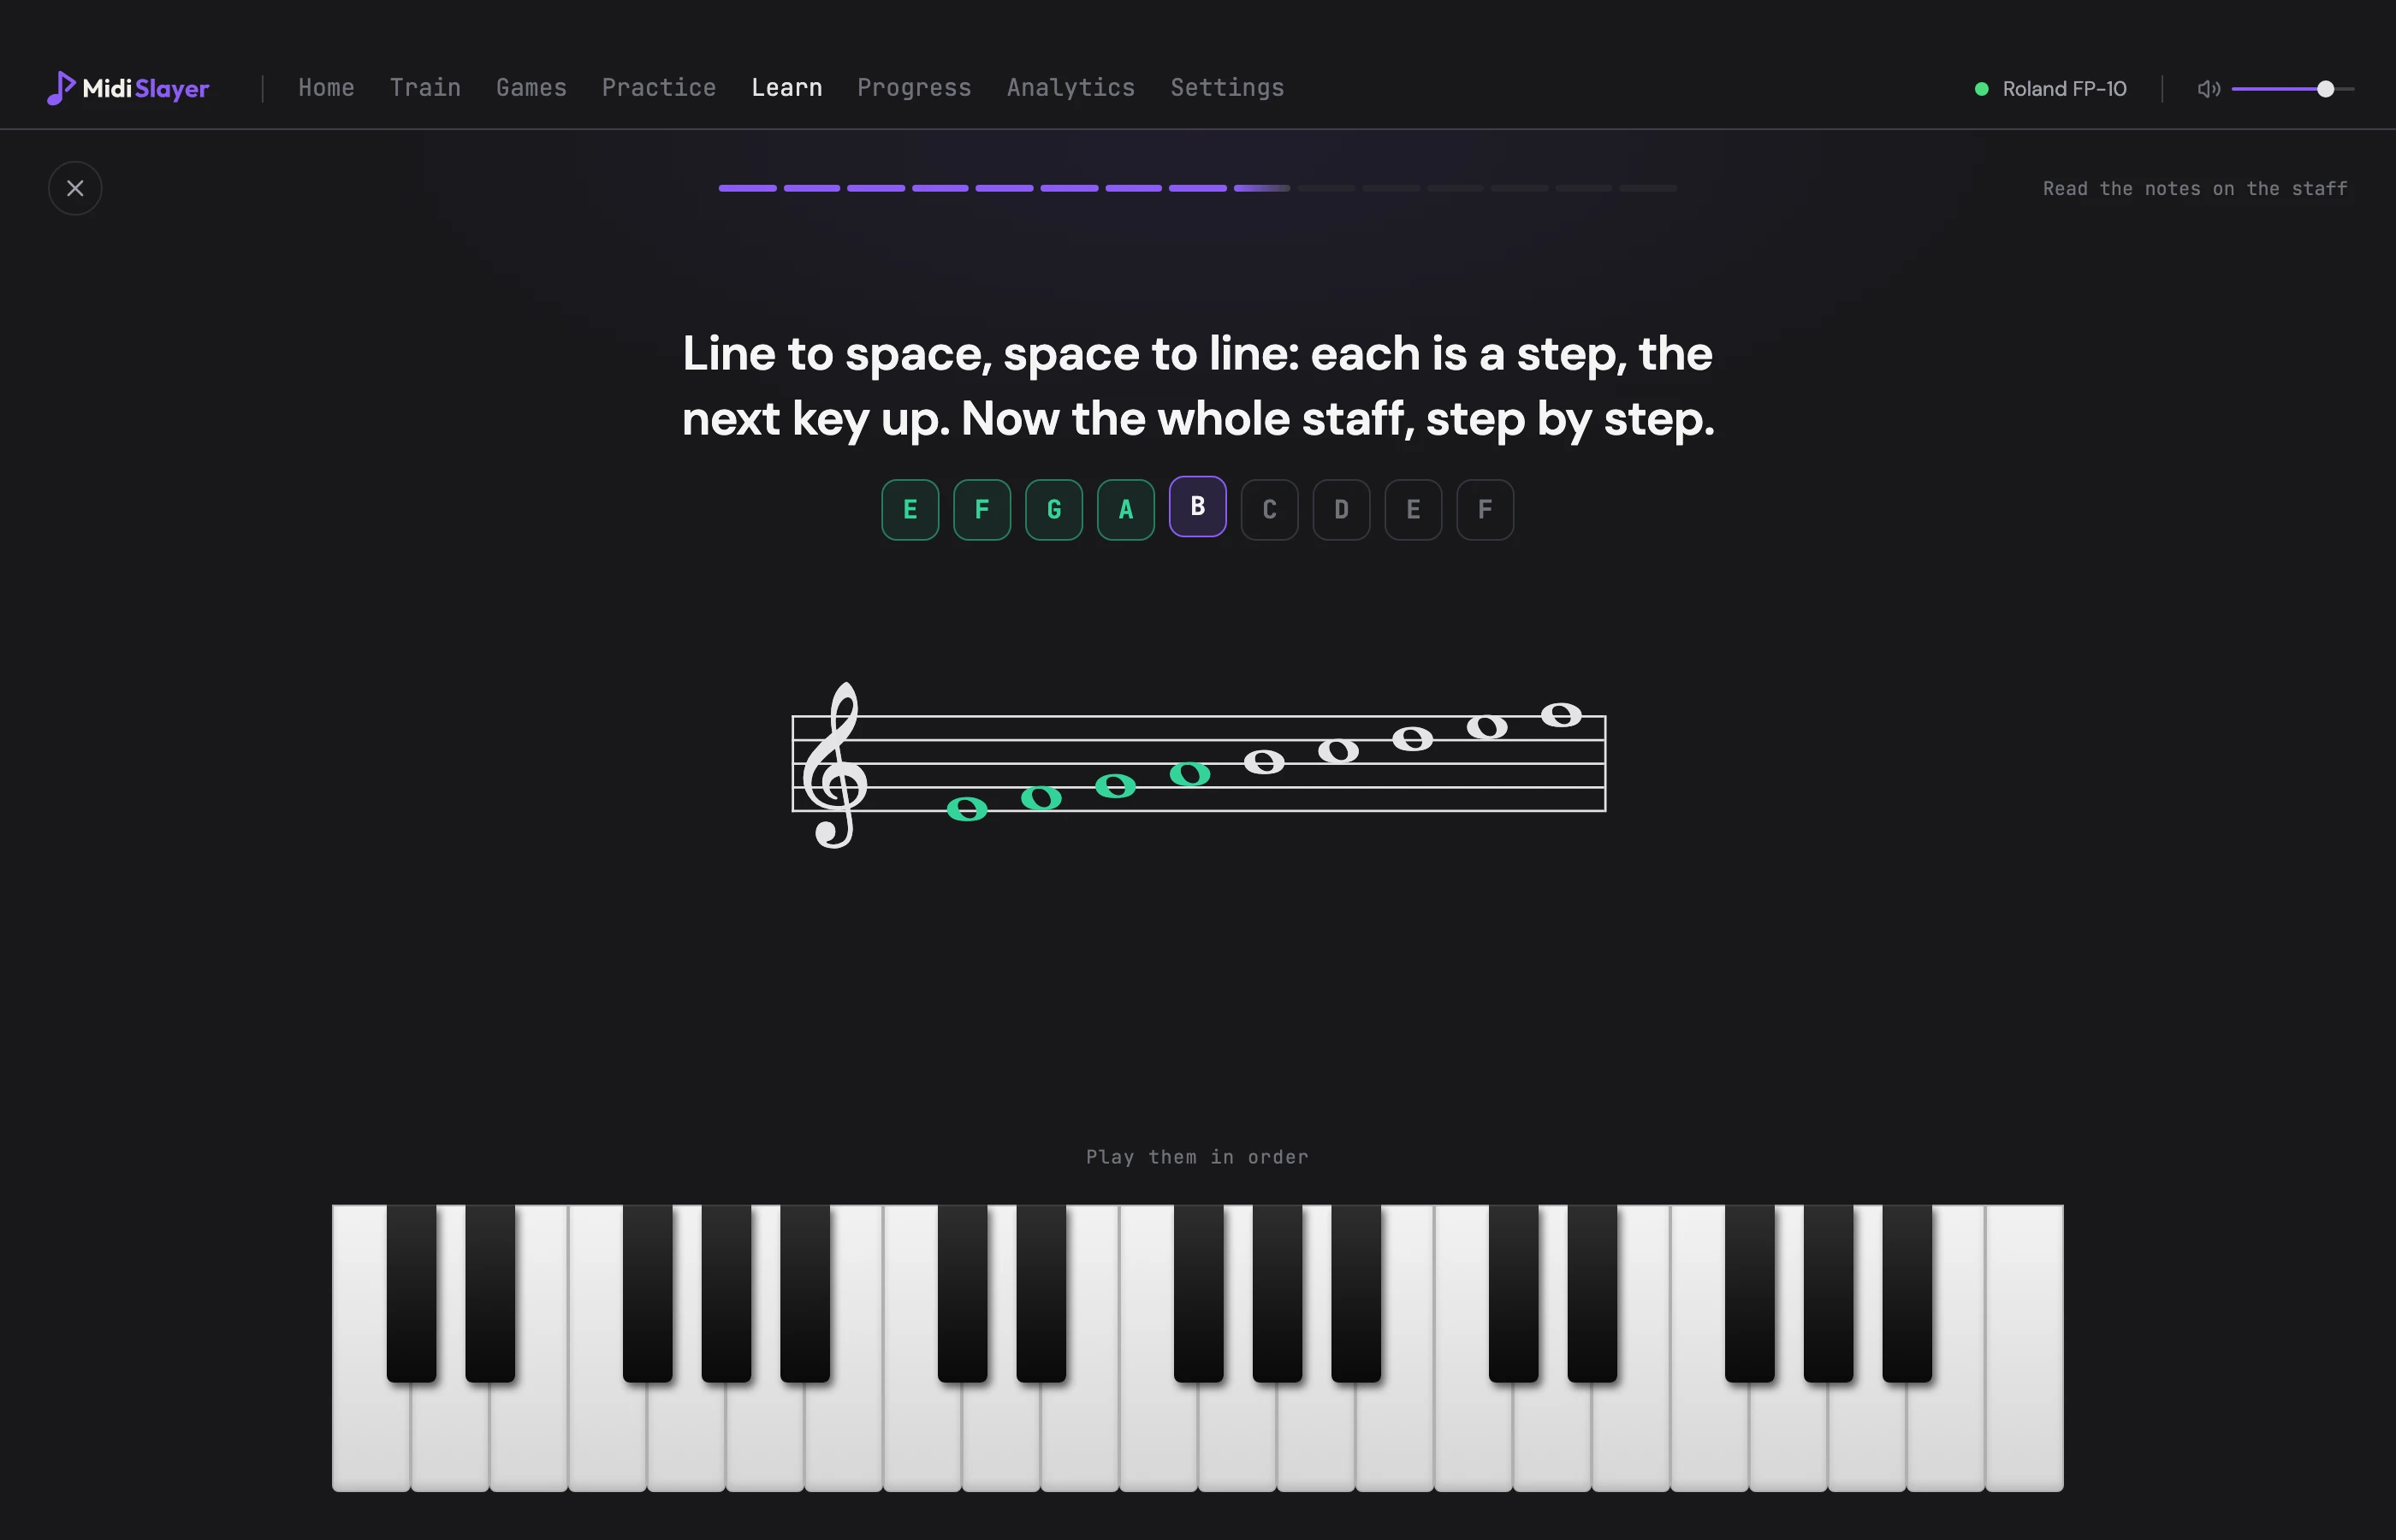
Day 5 is the bass clef, for the lower notes and the left hand. Its two dots hug the F line. It's the same alphabet, just in a different position, so the landmarks move but the method doesn't.
Day 6 joins them into the grand staff. That's how all piano music is written: treble on top for the right hand, bass below for the left, middle C as the hinge between them. Then sharps and flats, which are just the black keys getting their names. A sharp is one key up and a flat is one key down.
Between lessons, five minutes of single-note flashcards is the cheapest reading practice there is: one note on the staff, you play it, it tells you. Short and often beats long and rare, and we wrote up why.
Day 7: soft and loud
How hard you press is music too. A MIDI keyboard sends exactly how hard each key went down. Play your softest note, then your loudest, and you've found your range. Soft, medium and loud are measured inside it. On sheet music, soft is p (piano) and loud is f (forte).
Then rest a day. Come back and play everything once more with no help: find three Ds, read a few notes cold, play a rhythm with a rest and a tie in it, and finish with a tune straight off the page. If that goes well, you can read music. Slowly, but for real.
Where MidiSlayer fits
All of the above is the Beginner stage in MidiSlayer: eleven lessons of two to four minutes each, and a check at the end. You play each step on your own keyboard. The lesson listens, waits for the right key and tells you what you actually pressed when it isn't the right one. A twelve-page Handbook and a glossary of 41 terms sit next to the lessons for anything you want to read up on.
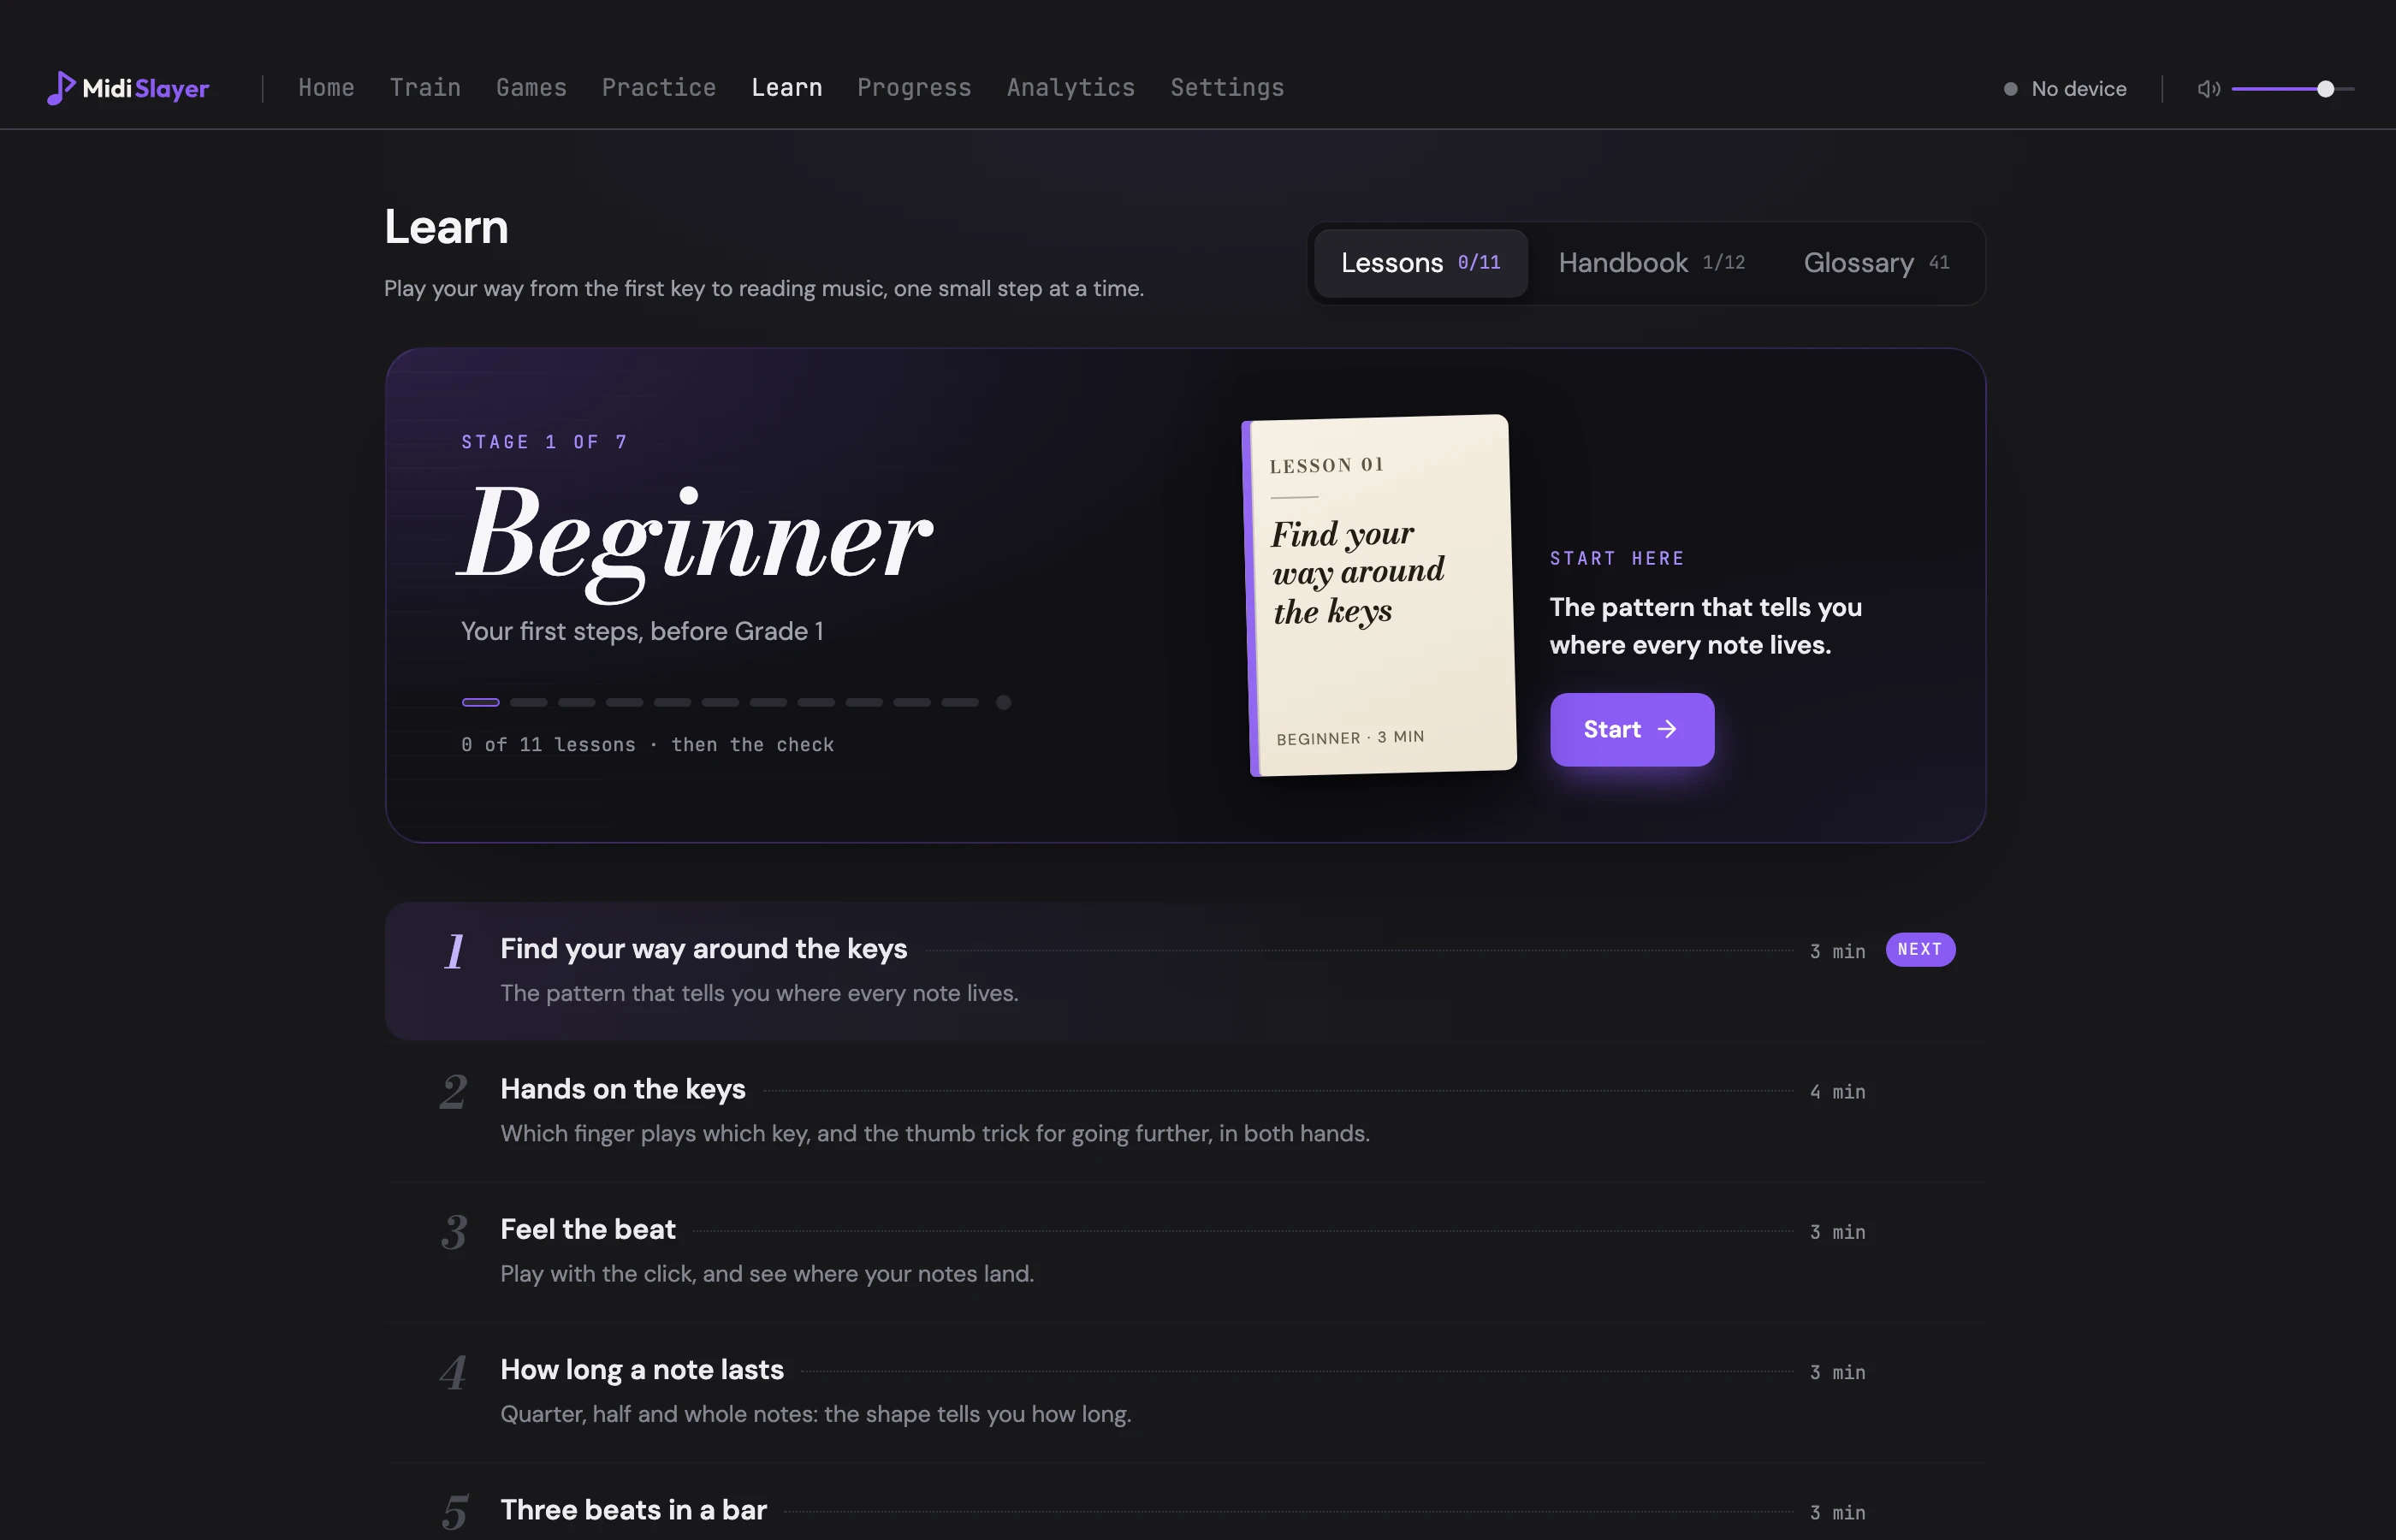
Beginner is free. The stages after it are part of the full version and arrive as each one is finished. You need a MIDI keyboard for any of this, because the whole point is that something hears you play. If you're not sure you need one, here's the honest answer. If you just bought one, start here.
Find C. Play it. That's the first note of the rest of it.